Tuesday, December 25, 2012

Stained Glass Afghan Completed!

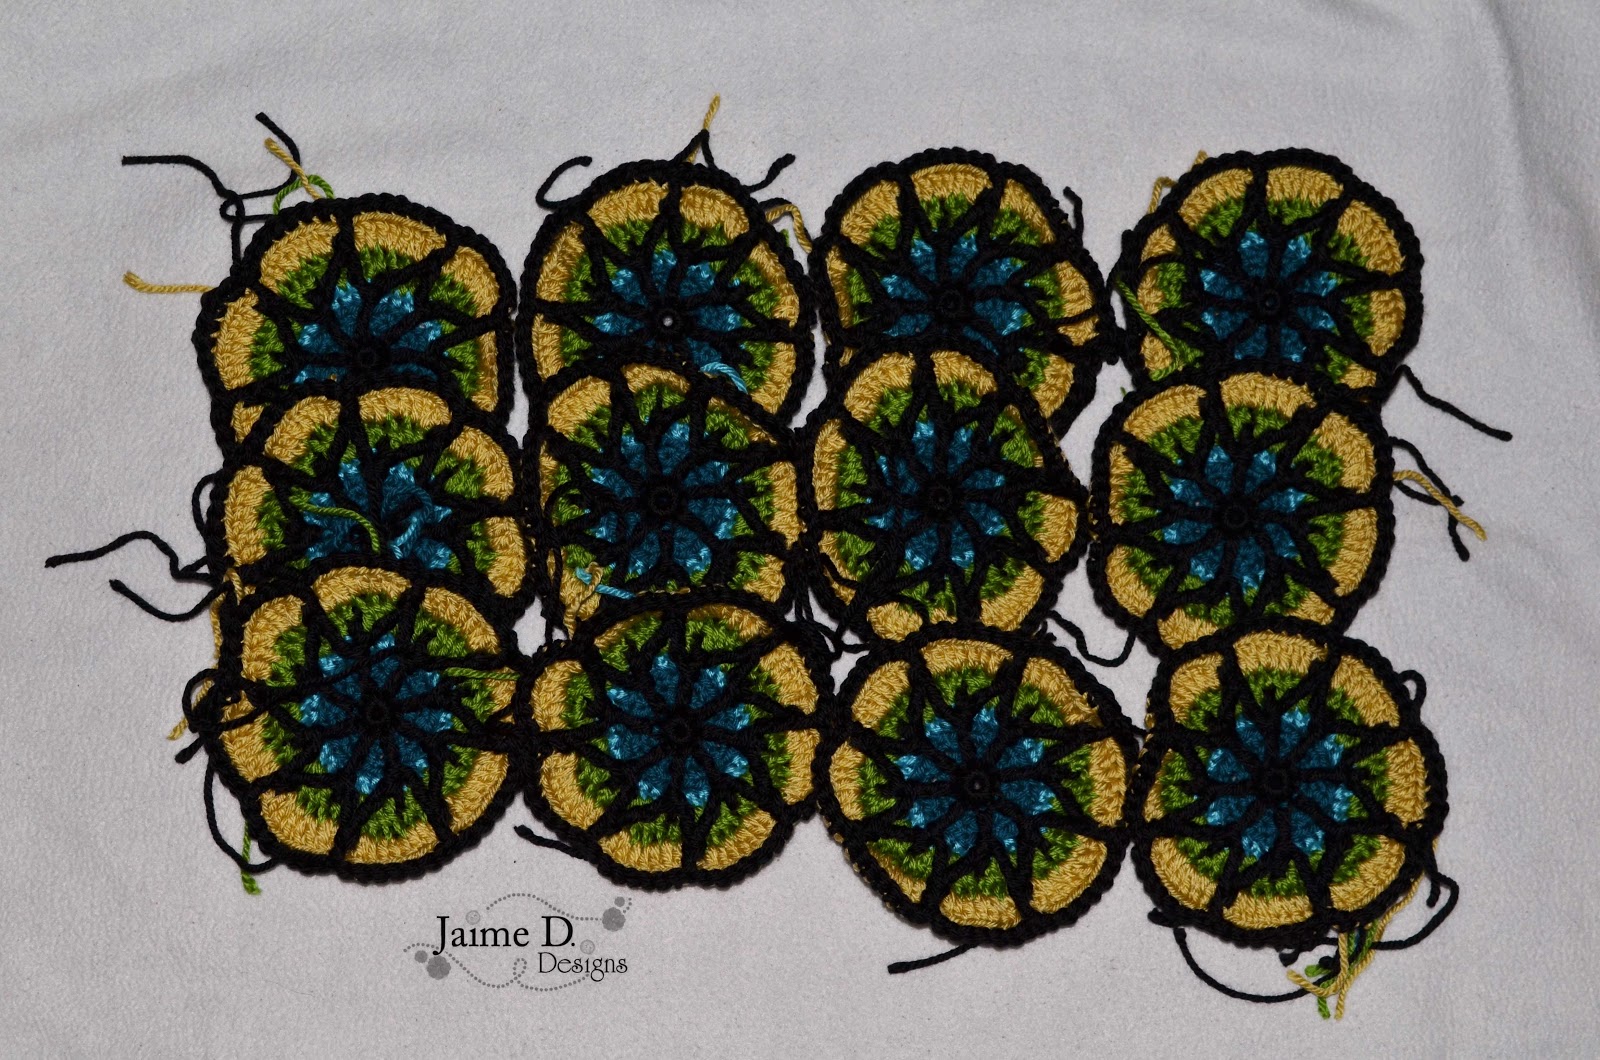
 I had 14 days to finish the Stained Glass Afghan, I DID IT and I lost 2 days because of birthday parties!!! I'd estimate about 75 hours of work over 12 days. Approximately 6+ hours of crocheting a day. My hands need a rest!

To see the progress from the beginning and to find out more about the yarns used, click over to the first post here.


Friday, December 21, 2012

Stained Glass Afghan Day 8

 All I am going to say today is that the corners are done and I am moving on to the border to make the circles squares. I won't say more because right now I want to say a few choice words about the first border row that I have been trying to figure out only to learn that there are many errors in it. If I go on I will end up in a rant and off on a tangent. You don't want that. LOL. :)


Thursday, December 20, 2012

Stained Glass Afghan WIP Day 7 plus a visit with SANTA!

 (I'm trying to start the Stained Glass blog posts with pictures of something besides the afghan so that if my Mom wants to be surprised, the afghan pictures won't show in the preview on Facebook...)

 Santa came to preschool today!!! He's an awesome Santa and is so patient with all of the kids! Today my kids had their Christmas Party at school. Food, Santa, presents, singing and candy! They had so much fun!


Now for progress on the Stained Glass Afghan. Today I finished the last round of the circles!


I started on 1 of 4 corner motifs. After all 4 corners are done, I do a few rounds of black to make it a square, then a join, then border!

4 days left to finish it!!!! It's crunch time!!!

Tuesday, December 18, 2012

Stained Glass Afghan WIP Day 6

I had to take 2 days off from working on the afghan. Sunday we had a birthday party for my now 5 year old and Monday was his actual birthday, so we celebrated that day as well. :) He had a LEGO gold mining cake. See the "gold" in the cake? The digger is digging it all up. lol


But here is the progress for today!


Saturday, December 15, 2012

Stained Glass Afghan WIP Day 5


Chugging away! I'm on round 11 of 13 for the circles. Next will be corners, borders to make it square, then joining and a few rows of border all around. Notice the bottom right circle? That's what it looks like on the back. Do you see all those ends that will need to be woven in!? Ahhh! That will take at least a day!


 I don't expect any progress to be made tomorrow becasue my big boy pictured at the top and below is celebrating his birthday! He'll be 5 on Monday!
 

Friday, December 14, 2012

Stained Glass Afghan WIP Day 4

I'm really liking the progress! I love it with the orange, it's really starting to pull it together. You can see the black one on the bottom right, that is beginning the next round!

Tips for how to work with Red Heart Sashay or similar mesh yarns


Scarf Vader
I recently got an order for 11 ruffle scarves and an order for 2 more. Let me tell you, by the end of those 13, I have it down to a science! After I finished those two orders, I had done nearly 30 scarves  in the last few months. Today I want to share with you some tricks that I learned along the way.

Red Heart Sashay and Premier Starbella are both yarns that are more like a fabric. They are mesh with a thicker border on one side, sometimes with a metallic thread running through it. The part you crochet into is the side opposite of that thicker side.

Sashay and Starbella both begin in a skein. You can pull from the center or from the outside. If you pull from the center you will find that you will need to untwist it every few feet or so. I don't know about you, but when I get going, I don't want to stop and untwist. Working from the outside is ok, but it rolls all around and isn't my favorite way to work. Also, while you are working the yarn, you need to pull open the mesh so you can get access to the holes in order to insert your hook. What I find worked really well for me is to start from the outside, spread the mesh with my fingers and wrap it around a toilet paper or paper towel tube at the same time. This is what it looks like when wrapped.


So now you have it wrapped around a tube, you could work it from here, but it will keep rolling away from you. Next I put it on a dowel rod, and put it across the top of my feet so it can freely roll without going all crazy! Another option would be if you have a freestanding toilet paper holder that you could put it on. I didn't have one and I am a big fan of working with what you have.

You can see here it is on the dowel and resting on the top of my feet for easy rolling.
My favorite way to work with this yarn is with this video below. In the example, they use Starbella, but it works the same with Sashay.


Have you made any ruffle scarves? Have any tips to share with me? Comment below with any advice you might have!

Thursday, December 13, 2012

Stained Glass Afghan WIP Day 3, gingerbread men, and destruction!

Today was NOT productive! My husband was off from work today so I was less productive because of that as well. But what really put me behind was last night after I finished row 9 on all 12 circles, I realized I did it wrong! So I had to "frog", that means rip it (see how it sounds like a frog?!) all out and re-do the whole row. So this morning I started all over again on the row.
Row 9 done WRONG! BOOOO!
Row 9 done RIGHT! Ahhh!

 This little boy is also quite distracting with his cuteness and putting his Darth Vader mask on the Christmas Soldier cookie jar that I pulled out of the Christmas decorations today. Did I mention we put up our tree today too?!
 But this cute little boy picture above, quickly broke my cookie jar. :/

And the other little boy broke my necklace. See why I got nothing done today?!


 But the best part of the day was seeing them in their Christmas program! Aren't these little gingerbread boys and girl so cute?!

My number 1 job and priority is being a Mom. So yes, these distracted me from what I wanted to do, but I wouldn't have it any other way! Might I miss my Christmas deadline? Maybe. But they will never be 3 and 4 years old again.


Wednesday, December 12, 2012

Stained Glass Afghan WIP Day 2

It's the second day of work on the Stained Glass Afghan gift. I feel very accomplished at finishing through round 8 but I know my progress will get slower and slower as the rounds get bigger and bigger. For now I am happy with the progress!
Through round 7.
Through round 8.

Tuesday, December 11, 2012

Stained Glass Afghan WIP

Today I am finally getting to start on my Mom's Christmas gift. A few months back she mentioned that she liked one that I shared on my Facebook page.

I bought the book from a wonderful lady in a crochet group I belong to, I bought all the materials, I made a test square to make sure I liked the colors. Then the holiday rush hit and it got pushed to the back burner. Fast forward a few months to today! Finally I get to start on it! I'm going to share my progress with you as I finish each round. It will keep me accountable right? I don't want to let you guys down! So here's the progress as of 6pm est on December 11th, 14 days till Christmas.

Updated 12/25/12: Did I finish in time? Click here to find out!

Info:
Pattern- Stained Glass Afghan
Yarn-  Red Heart Soft in Cherry Red, Guacamole, Honey, Tangerine, Teal, Turquoise, Black
Hook- H

Day 2
Day 3
Day 4
Day 5
Day 6
Day 7
Day 8
Day 9
Completed!

Friday, November 30, 2012

Winter Bear Ornament or Applique

Winter Bear


Written by: Jaime DeVries of Jaime D. Designs
You can download this directly from Craftsy or Ravelry as well.
Materials:
·         Worsted Weight yarn in 2 bear colors and in 2 hat/scarf colors. I used Red Heart Warm Honey, Buff, Aruba Sea, White
·         H and E hook
·         Embroidery thread
·         2 buttons
·         Yarn needle
Head
Start with a magic circle. Do not join at the end of the rounds, use a stitch marker to keep your place.
Round 1: 6 sc in the circle. Pull tight. Do not join.
Round 2: 2HDC in each sc around (12).
Round 3: *HDC in next, 2HDC in next* repeat around. Do not finish off, continue on to the ears. (18)
Ears
SC in the next st, slst in the next 2. In the same stitch, Ch1, HDC, 3DC, HDC, slst.
Slst in the next 4. In the same stitch, Ch1, HDC, 3DC, HDC,  slst. Finish off, weave in the ends.

Mouth
Ch 4, 2 SC in the 2nd ch from the hook. SC in next st. 3 SC in last. Working on other side of the ch, SC in the next 2. Slst to join. Leave a tail for sewing.
Scarf
Ch. 18 in color A. Join in color B.
Sc in 2nd chain from the hook and each ch across. Switch to color A. CH 1, turn.
SC in each SC across. Continue working around the stripes. Put 1 SC in the end of the middle stripe and continue around to the first stripe. Slst in each loop of the chain to the end. Put 1 SC in the end of the middle stripe and slst to the first SC. Finish off leaving a long tail for sewing on to the bear. Weave in your ends. Move on to the tassels.
Tassels
Cut 4 strands about 3 inches long of color A and 2 strands of color B. Attach them to the ends of the scarf.
Hat
Begin with a magic circle.
Round 1: Sc 6 in circle, do not join.
Round 2: 2 sc in each sc around.
Round 3-8: SC around. At the end of round 8, slst in next. Fasten off leaving a long tail for sewing.
If you want a little poof on top, wrap some white yarn around 3 or 4 fingers about 6-8 times. Remove carefully from your fingers, cut another short piece, wrap it through the middle and tie a knot. Cut the loops.  Thread it through the top of the hat and knot on the inside.
Assembly
Sew mouth piece at the bottom edge of it’s head.
Sew the scarf along the bottom of the head, sewing through both layers of the scarf, along the top edge of the scarf.
Slip the hat over one ear, sew  1 or2 rows up from the bottom of the hat, through both layers of the hat and through the ear.  When it is sewn on, roll the bottom of the hat up covering the sewing stitches.

Add on your button eyes.

Tuesday, November 20, 2012

Small Business Saturday and Cyber Monday!

I am going to have some great deals for Small Business Saturday and Cyber Monday!
Here are the links to the sale item that will be available 11.24-11.26.


Friday, November 2, 2012

Happy Birthday and a sale!

Crochet Knitting Cakes
Wouldn't this be an awesome cake?! Photo courtesy of Pink Cake Box.
November is always a special month for me! On November 1st, 2010, I started Jaime D. Designs after making 2 owl hats for my kids. I got such great feedback from my friends and family! Many of them urged me to sell them online. My mom taught me when I was much younger how to crochet, but at 12 years old and in 1999, it wasn't very popular and there weren't very many fun projects out there. I made a scarf, that I still have, and that was it. Then I saw a blog giveaway for patterns from Inner Hooker. I didn't win, but I bought her Owl pattern. After I made those first 2 owls, I was hooked. Haha, pun intended. :)

This was my first hat I made after picking it up again.

As many stay at home moms know, there is sometimes a feeling to contribute to the family financially. Of course you are already doing a very important job taking care of your child or children, but there is still that need to help provide for the family. There is also a need for a hobby. Something to do.
When I got so much great feedback, I decided this would be what I do to help my family financially and give me a hobby. Little did I know the journey it would take me on! An exciting journey too! Some ups and downs. And LOTS of lessons learned over time!

This is 1 of 3 hats I made for my first order.
My very first goal was to make enough money to be able to send my then 2 year old to preschool the following fall. I reached my goal very quickly!

Here we are 2 years later and going strong! The next long term goal is taking the family to Disney world in a few years.

There are a ton of people I would like to thank! First of all my family. They put up with a lot from me, especially my husband! I'd also like to thank my Mom for teaching me in the first place! There are also some great local ladies who have helped me tons! Angela at Angela Douglas Photography, Desiree from Seren Fach Boutique, Sharon from MomOnDealz, and Beth. There are also tons of crochet ladies I've met online, like Lizzie from Lizzie's Lovelies and Karen from DuncanCreative. There are so many more,but too many more to list!

Then I'd like to say a big thanks to all of my fans and customers! Without you I wouldn't be here at all! You guys have helped send both of my kids to preschool, paid for little league T-Ball, fun family outings, and many other things. It has been such a blessing working with all of you, many I have gotten to know very well!

To celebrate I am going to have a pattern sale on Ravelry for those of you that do crochet. Buy 1 get 1 free! Use the code Birthday2.
I'd also like to offer a sale for my fans who don't crochet. I'd like to offer 10% off to all new orders. Orders must be placed between 11/2/12- 11/9/12 to qualify for the discount. Email me at jaimeddesigns@hotmail.com to place your order.

Thank you for sticking with me! Enjoy the photos below of some of the items I've made this past year.
Pattern by Snappy Tots
Pattern here.
 
Pattern here.

Pattern by Mamachee * Chochet makes me happy!

Pattern by Snappy Tots.

Pattern by Snappy Tots.

Pattern by Nerdigurumi.
Thank you again to Pink Box Cake for allowing me to use the photo of the knitting cake at the top. If you are in New Jersey, they look like a really awesome place to get a cake! If only they delivered to Virginia and made it crochet instead. :)

Saturday, October 13, 2012

Ribbed Fingerless Gloves Giveaway!

Win a copy of my new ribbed fingerless gloves pattern. Adult and Child sizes. I'll draw a winner or two or more (depending on how many people enter) on Monday!
The pattern will be up on Ravelry and Craftsy tomorrow morning!


Enter via rafflecopter below!
a Rafflecopter giveaway


Thursday, July 12, 2012

Crocheted Teething Necklace


Crocheted Teething Necklace
By Jaime DeVries of Jaime D. Designs

Materials

Size 3 Crochet Cotton Thread
Size 6 Steel Hook. 1.8MM
5 Round 5/8 in. beads (15.9mm) Unpainted, unstained, untreated
10 Rounds ½ in. beads (12.7mm) Unpainted, unstained, untreated
40-50 inches of ribbon
Yarn Needle
Stitch marker

Notes:
You will be crocheting around the 5/8 inch beads. It is also done in the round. You could use a stitch marker or just count. In the photos I am using a larger hook to make it easier to see.

Round 1:  Using a Magic Circle, ch1 6sc in the circle. (6)  DO NOT JOIN Pull circle closed a LITTLE. If you pull it all the way closed you will have a hard time getting the ribbon through at the end. Trust me. Learn from my mistake! :)

Round 2: 2sc in back loop of each sc around (12)
My hook is in the back loop, the hole isn't closed all the way, I did not join.

Round 3-6: Sc in back loop of each sc around. (12)
Now you should put your wooden bead in because you will be decreasing next. I like to take the end of the thread from the beginning and weave it up through the hole too. I don’t know if it helps, but I like to think it does. You can also put it in before you do round 6 and work around it. Sometimes that is easier.

Round 7: sc2tog in back loops of each sc around. (6)

Finish off and weave around the circle to close it up some if you need to. Remember, don’t close it all the way as you still need to put ribbon through it. I also like to pull the end through the bead and back out the bottom (round 1) and then cut them both. You should now have a completed bead!
Repeat as many times as needed.

Assembly
Take your yarn needle and thread it with the ribbon. Put the beads on in order that you like. I did a small bead, large bead small bead repeat. When you get them all on, tie a knot at each end of the beads. I gave it a little wiggle room, but not much.

Closure
 Thread each side of the ribbon through 1 bead each. Then thread it through the bead on the other side. Tie a knot at the end of the ribbons and CAREFULLY burn each end of the ribbon with a lighter so that it doesn’t become frayed.

There you have it! A teething necklace!

PLEASE do not leave baby unattended with this piece of jewelry and check the beads often!

2012 Jaime D. Designs  www.jaimeddesigns.com  Please do not copy, re-write, or sell, or this pattern. Finished items may be sold, but please credit Jaime D. Designs as the pattern designer.  Come visit us on Facebook at www.facebook.com/jaimeddesigns. Help is available at jaimeddesigns@hotmail.com

Print Friendly

Pin It button on image hover